Managing Multi-Tenant Workspaces
In this guide, you will learn how to efficiently manage multiple workspaces and tenants within Askyura. By the end of this guide, you will understand the difference between workspaces and tenants, and how to create and organize them to optimize your workflow and team management.
What is a Tenant?
A tenant represents the mother company or the top-level organization. It is the main account under which all branches, subsidiaries, or departments are organized. Tenants allow administrators to manage company-wide settings, users, and permissions across multiple workspaces.
Example: Suppose your company is TechCorp, which owns several branches in different cities. TechCorp would be the tenant, and all branches are organized under this tenant.
What is a Workspace?
A workspace represents a branch company or a subsidiary under a tenant. Each workspace operates semi-independently, with its own set of agents, conversations, and settings. Workspaces allow you to manage each branch separately while still being connected to the mother company (tenant).
Example: Under the TechCorp tenant, you could have workspaces for TechCorp New York, TechCorp London, and TechCorp Singapore. Each workspace has its own agents and operations, but they all report to the same tenant, TechCorp.
How to Create a Tenant
Follow these steps to create a new tenant (mother company) in Askyura:
Step 1: Navigate to the Dashboard Switcher
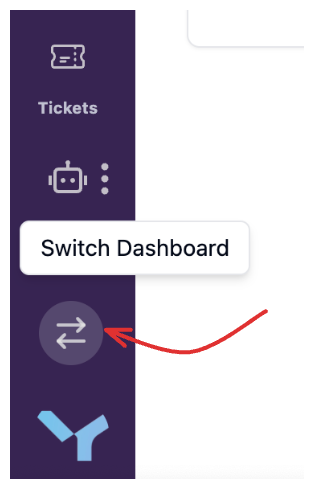
Creating a tenant is done through the Dashboard Switcher. To access it:
- Click Switch Dashboard at the bottom of the left navigation, just above your profile avatar.
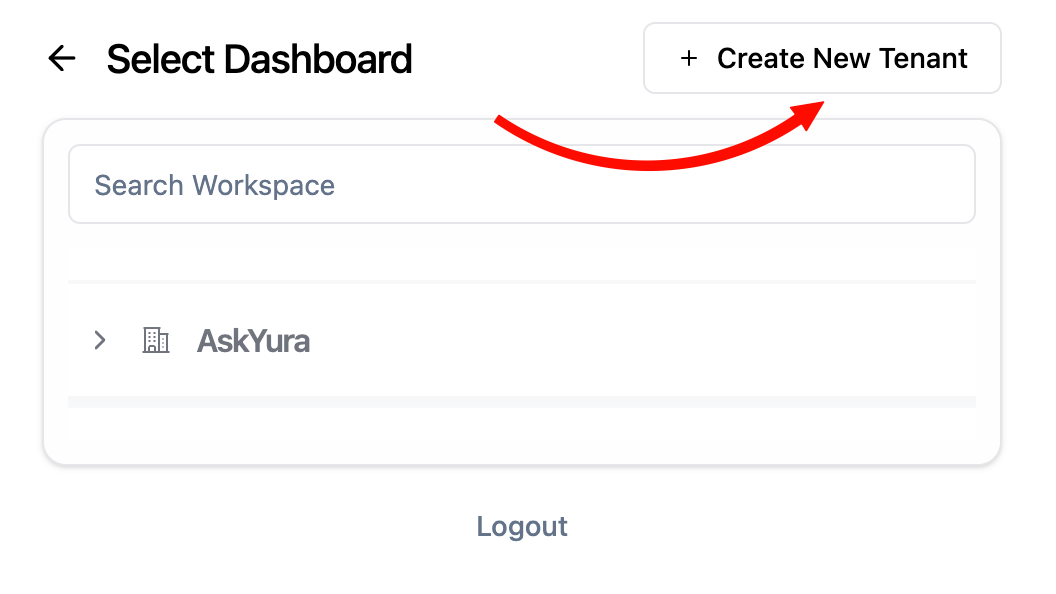
Step 2: Click "Create New Tenant"
On the Dashboard Switcher page, click the Create New Tenant button to start adding a new tenant.
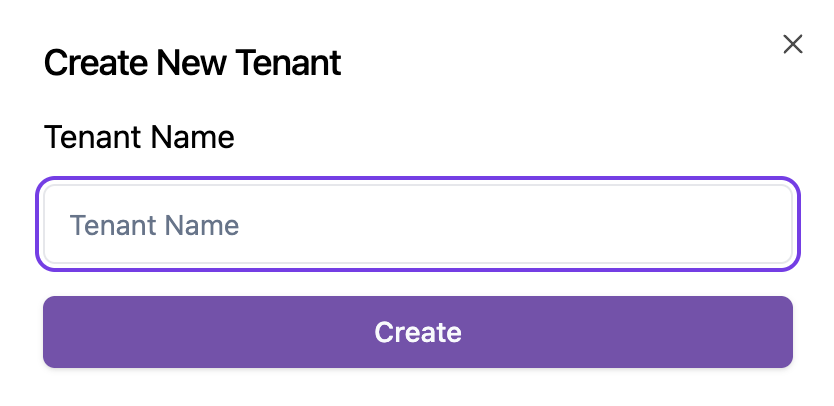
Step 3: Fill in Tenant Details
- Enter the Tenant Name in the provided field.
- Click Create to finalize the tenant creation.
Once created, your new tenant will appear in the Dashboard Switcher and can be accessed anytime from this page.
How to Create a Workspace
Follow these steps to create a new workspace (branch company) under a tenant in Askyura:
Step 1: Navigate to the Dashboard Switcher
- Click Switch Dashboard at the bottom of the left navigation, just above your profile avatar.

Step 2: Select Tenant and Click "Create New Workspace"
- Find the tenant under which you want to add a workspace.
- Note: You can only create workspaces for tenants you have access to manage. Tenants you can manage are shown in blue font.
- Once the tenant is found, click the Create New Workspace button to start adding a workspace.

Step 3: Fill in Workspace Details
Enter the Workspace Name in the provided field, then Click Create New Workspace to finalize.

Once created, your workspace will appear under the selected tenant in the Dashboard Switcher and can be accessed anytime.
