Create Ticket
Creating a New Ticket via the Ticket Menu
To create a ticket directly from the ticket menu, simply click the Create New Ticket button in the top right corner.

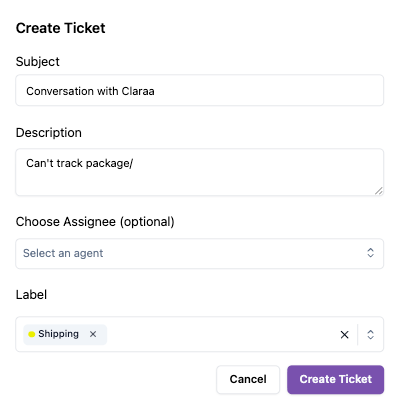
You will be taken to a form page as shown in the following image.

In this form, you can fill in:
- Contact → Select the user or customer for the ticket.
- Subject → Short title of the ticket.
- Description → Detailed explanation of the issue or request.
- Attachments → Upload supporting files (images, documents, videos, etc.).
- Choose Assignee → Select the team member who will handle the ticket.
- Label → Add a label for easier grouping.
Once everything is filled in, click Save, and the new ticket will immediately appear in the main list.
Note: You can upload up to 5 files (maximum 50MB per file), so if you need additional attachments, make sure they are the appropriate size.
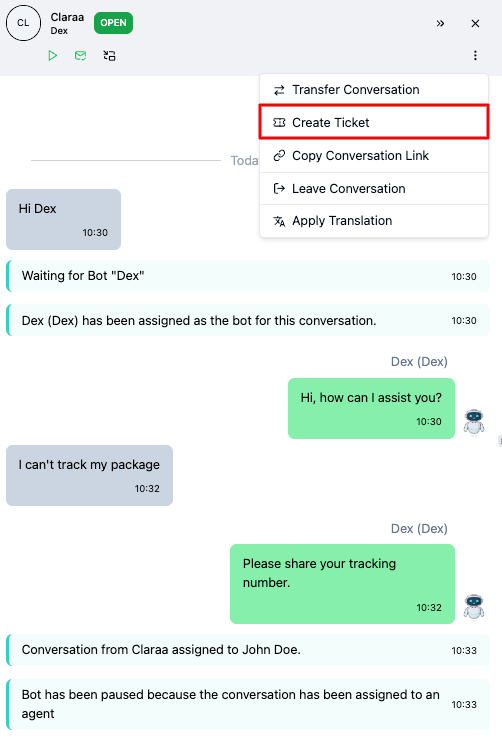
Creating a New Ticket via Chat
To create a ticket via an active conversation, click the three-dot icon (more) as shown in the image below.
Next, fill in the requested details for the ticket that will be raised to the agent.
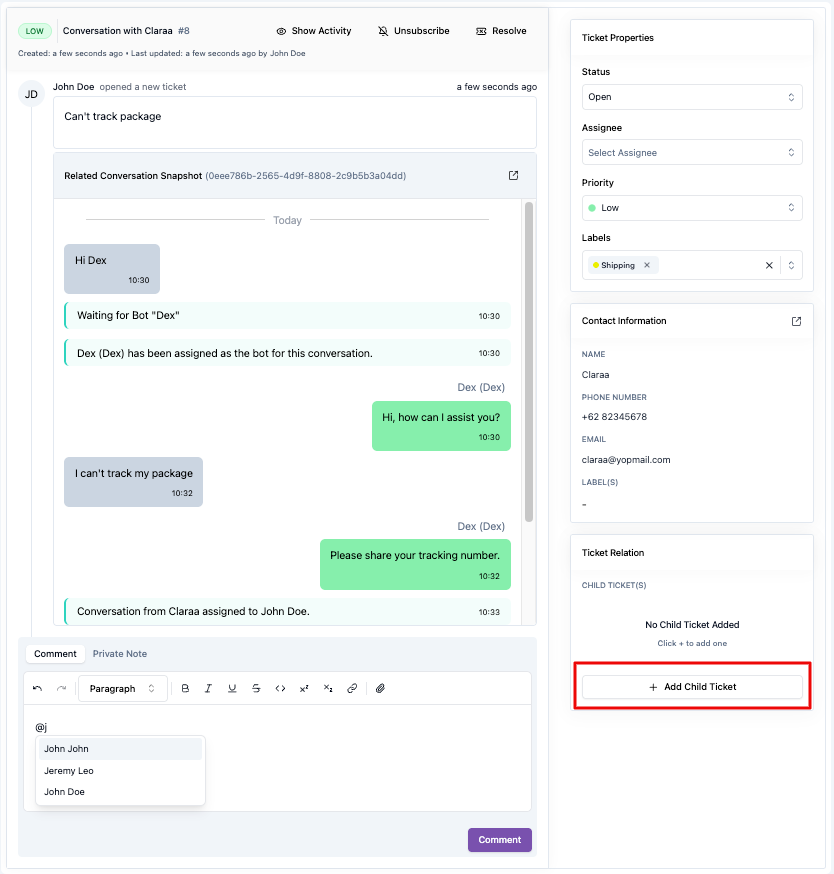
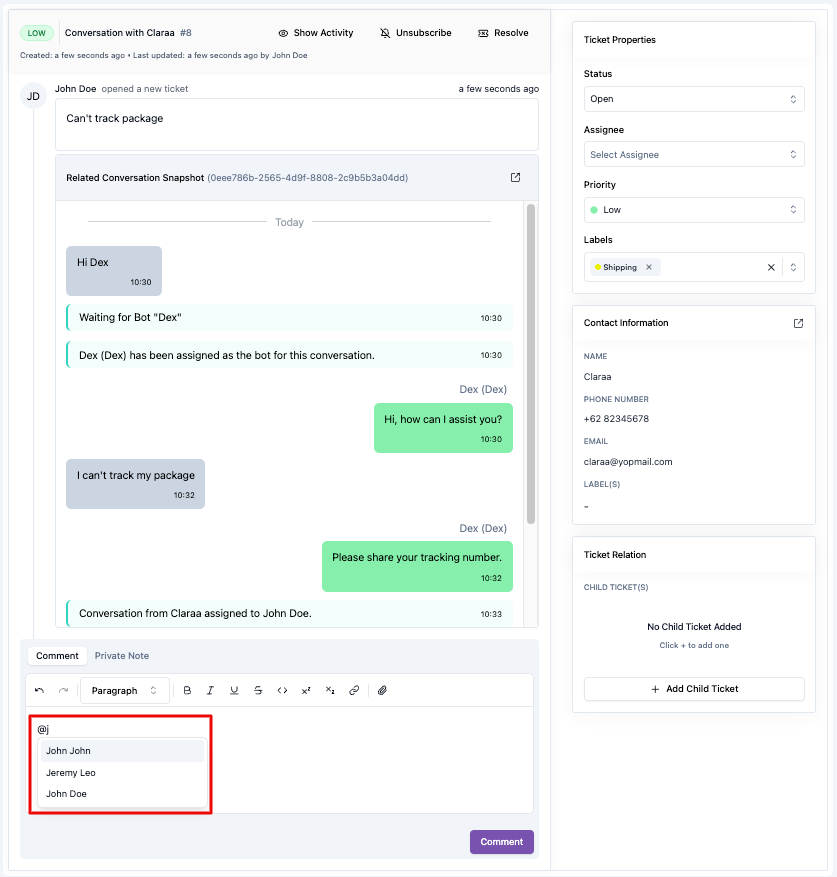
You can also mention other agents on the ticket. Just tag them using (@), and a list of agents you want to mention in the ticket conversation will appear.
Creating Child Ticket
A child ticket is useful for creating sub-tickets derived from a parent ticket. Please note that one child ticket can only have one parent ticket.