Add New Contact
Adding a New Contact

When you press the "Create new Contact" button, the system will display a form to fill in the details of the new contact.
The following describes the parts of the form:
Basic Information
This form contains the basic data needed to save a new contact.
-
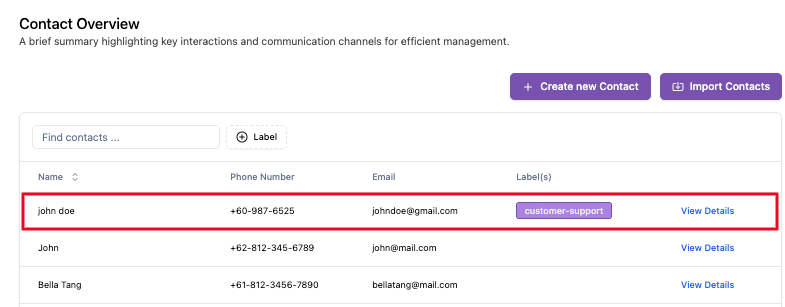
Name
Full name of the contact for easy identification.
-
Phone Number
Contact phone number that can be reached directly through the system (the number format has been adjusted to the country code, for example
+1for United States). -
Email
Contact email address. This field is also mandatory because it can be used for additional communication such as sending reports, notifications, or follow-ups.
-
Label(s)
Determine the category or grouping of contacts based on certain characteristics, for example:
- "VIP Customer"
- "Potential Lead"
- "Support Ticket User"
This label helps in communication segmentation and future analysis.
Contact Attributes
This section is used to store additional information that is specific and consistent for each contact.
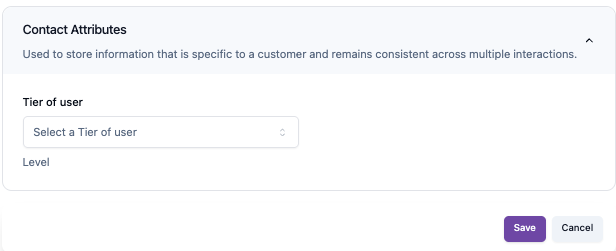
For example, in the UI above there is a field:
-
Tier of User
Describes the level or level of users on the platform (for example: Basic, Premium, or Enterprise).
This information can be used to provide services that match the user's level.
Action Button
- Save: Saves the new contact data into the system.
- Cancel: Cancel the contact creation process and return to the main Contact Overview page.
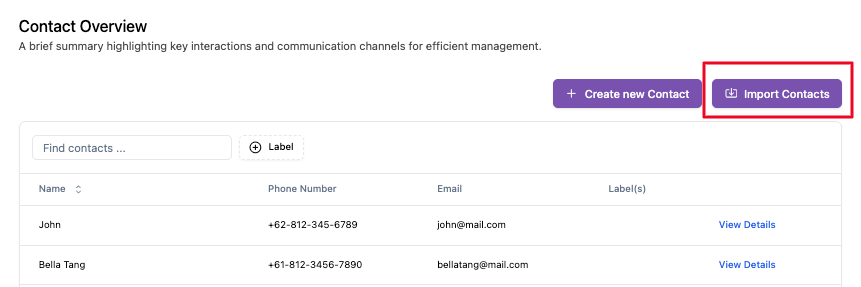
Importing Contacts
In the contact menu you can also import contacts if you already have a previous datasheet, but make sure you adhere to the format provided by AskYura, here are the steps for importing contacts:
-
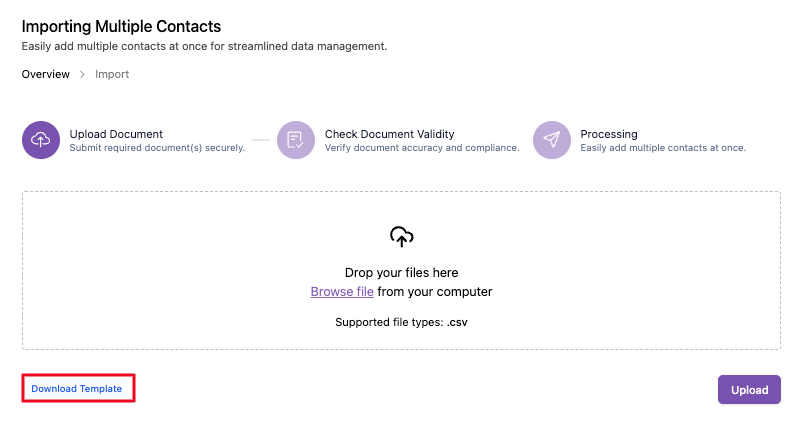
Click "Import Contacts" button and you will see the file uploader to upload your file.
-
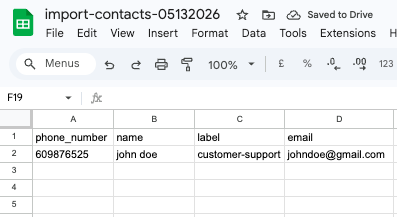
If you don't have an import contact template, click Download Template in .csv format
-
Fill in the contact details based on the template from AskYura
-
Upload the file

-
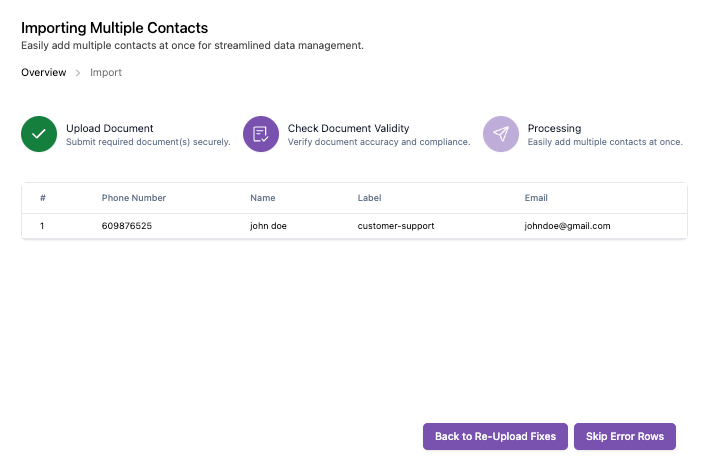
Then you will see a preview of the data you uploaded. If there are no errors, click Skip Error Rows button
-
Click "Process" button to complete the process.

-
The contacts you uploaded will appear in the contact list.